When laying out your Iowa website, one of the most important elements to consider is images. Images play a key role in telling your Iowa story, highlighting your department’s work, and giving users a visual sense of campus life and what Iowa has to offer. They help capture attention, reinforce messaging, and create a strong first impression for prospective students, faculty, staff, and visitors.
However, using images effectively goes beyond simply choosing great photography. Image size, file format, and compression all have a direct impact on website performance, accessibility, and user experience—especially on mobile devices. In this article, we’ll discuss how to properly prepare images for your website and why it matters.
Finding high-quality website images
You can find images in a variety of ways, but we recommend using Mediagraph, the University of Iowa’s approved image library resource. High‑quality campus images are available through Mediagraph and can be accessed by logging in with your HawkID and password. These professional photographs are taken by campus photographers and are approved for use on Iowa websites, making them an excellent resource. Within Mediagraph, you can search for images using a variety of keywords to find photos that best fit your content.
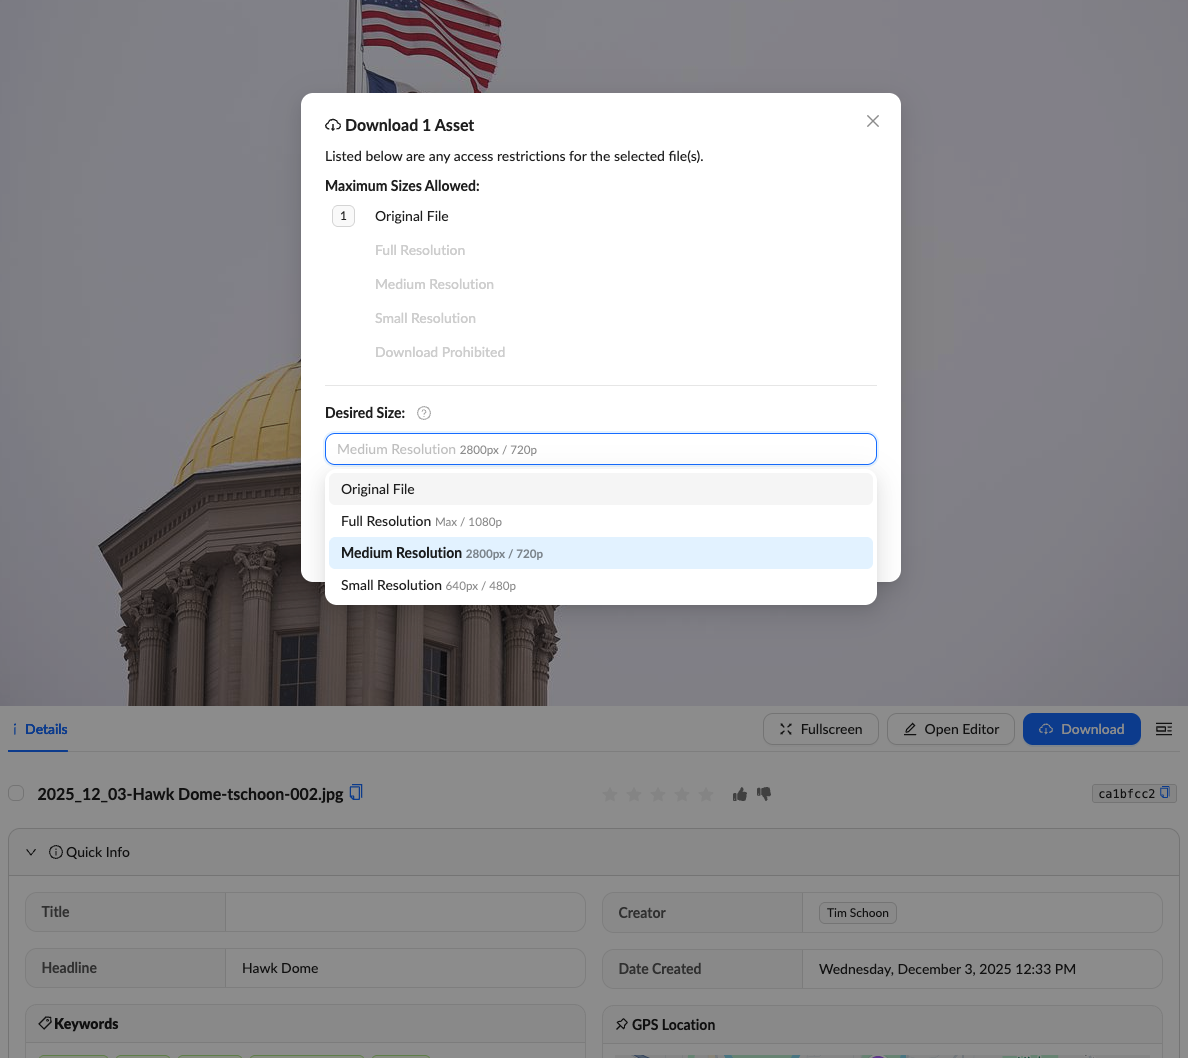
When downloading images, it’s important to select the correct file size for web use. Medium‑resolution images work best for large banners or images that span most of the page width, while smaller‑resolution images are ideal for cards, stats, or other components that will never span the full width of the page. Original or full‑resolution image files should not be downloaded for web use, as they are intended for print or archival purposes and can significantly slow down your website.
Before downloading an image, consider how you plan to use it as this will help you choose the appropriate size. As a general rule, download medium resolution for large banners and smaller resolution for cards or stats, and avoid using original or full‑resolution images on the web. Additional guidance on recommended image sizes for SiteNow can be found here.
Compressing images before uploading
After downloading your image, the next step is to compress it. Image compression reduces file size while maintaining visual quality, which helps improve page load times and overall website performance. Because image file size directly affects how quickly a page loads (especially on mobile devices) compression is a critical step before uploading images to your site.
We recommend compressing images using one of the following tools:
- Desktop software such as Adobe Photoshop or GIMP
- Online tools such as https://compressor.io/
- Or if you're doing batch compression on Mac, we recommend using https://imageoptim.com/mac
In some cases, you may want to use the same image in multiple places on your website. For example, you may have the same image you want to use in two components: a banner and a card. When this happens, it’s best to create purpose‑specific image files and name them clearly so they are easy to identify in your media library. For example: Iowa Old Capitol at Sunset – Banner v. Iowa Old Capitol at Sunset – Card. Using a clear and consistent naming convention makes it easier to filter, select, and reuse images correctly. It also helps prevent accidentally choosing an image that is the wrong size for a specific layout or component.
Checking image sizes on your Iowa website
If you are working to optimize existing images on your site, start by identifying images with large file sizes. While every situation is different, a good starting point is to address images that are larger than 1 MB. SiteNow is currently looking at ways to optimize images on upload and serve them as next generation image formats which will help with images going forward. To identify images with large file sizes we recommend you do the following:
- Sign in to your SiteNow website: Log in to your SiteNow website and navigate to your Media Library by going to Content > Media.
- Filter to images only: Use the filter options to display only image files. This makes it easier to review just the images that are on your site and other forms of media.
- Review the images in your library: Scan through the list of images in your media library.
- Check individual image file sizes: For all other images, click on each image to open its details. You will see the file size listed there. Make note of any image that is larger than 1 MB.
- Download large images and compress them: If an image exceeds 1 MB, right-click on the image and select “Save link as” to download it to your computer. Upload the downloaded image to one of the recommended image compression tools mentioned earlier. This will reduce the file size while maintaining acceptable image quality.
Re-upload and replace the image: Once the image has been compressed, upload it back into your SiteNow media library. Be sure to check the option that says “Overwrite original file” so the optimized image replaces the original version. Your larger image has now been successfully optimized and replaced on the site.
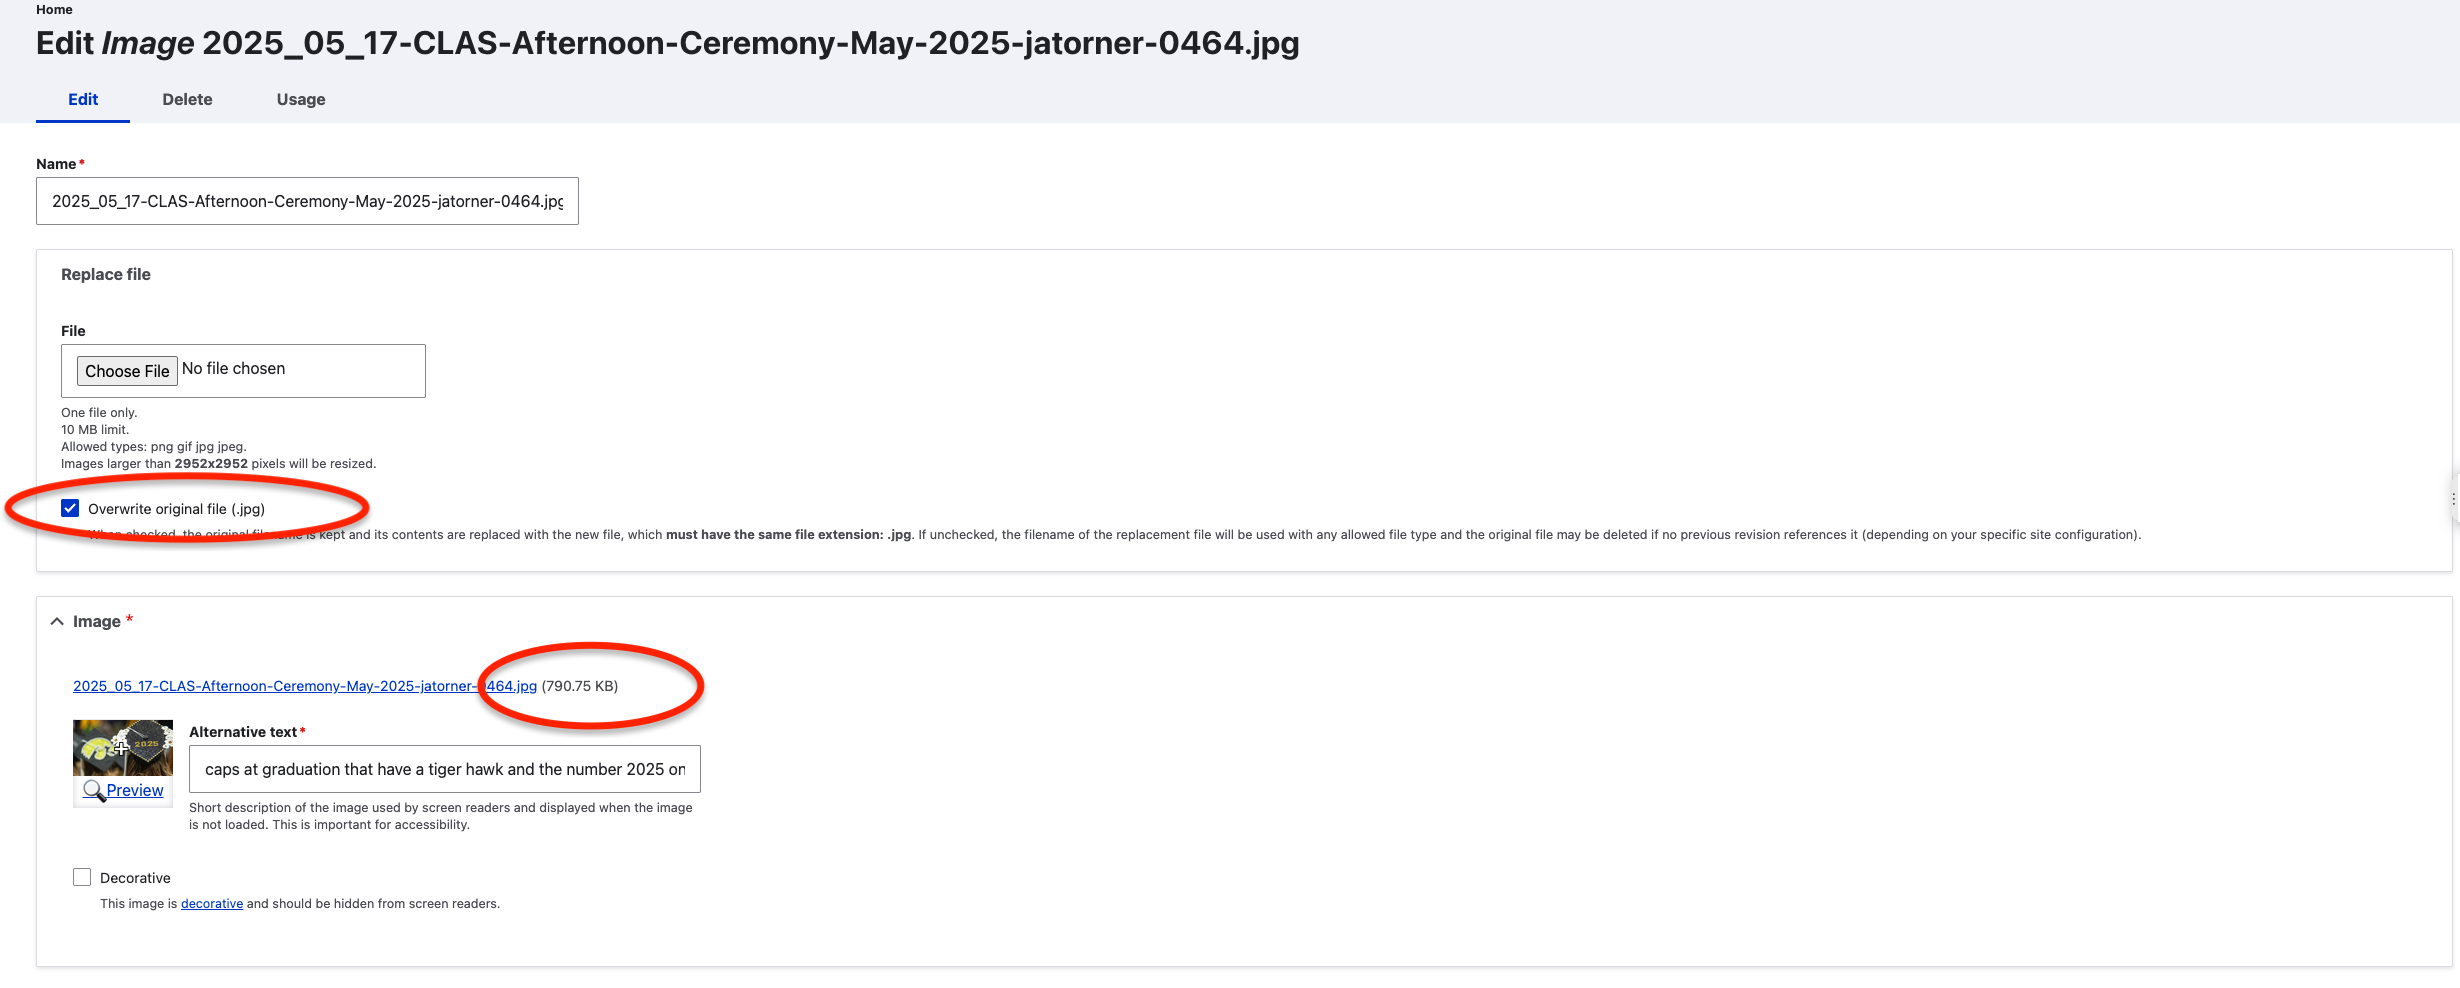
You can check the size of each image on your website by looking at the file size listed next to the image name. As a general rule, we recommend replacing any images larger than 1MB with compressed versions. After compressing the image, re-upload it to your website and be sure to select the option labeled “Overwrite original file.”
Image optimization does not have to happen all at once. Instead, think of it as an ongoing part of your governance plan. You can tackle image updates as you edit content, focus first on high traffic pages, and avoid trying to optimize the entire site in one effort. This approach keeps the work manageable and helps ensure it stays aligned with your overall content goals.
Along the way, it also helps to maintain a list or inventory of your images. Regularly reviewing this inventory makes it easier to spot images that are no longer being used and remove them from your site. Unused images can often be identified in the Usage tab, where you can see which assets are not referenced anywhere. You can also rename media files to reflect their optimization status and apply tags to track progress.
Why does this all matter?
Optimizing images is not just a best practice, it is essential to delivering an effective digital experience. Thoughtfully sized and compressed images support performance goals, reduce technical strain, and ensure visitors can easily engage with content across devices. Key benefits include:
- Faster page load times, especially on mobile devices
Properly sized and compressed images reduce page load times, which is critical for mobile users and visitors on slower connections. Faster pages keep users engaged help ensure a smooth mobile experience while still showcasing high‑quality campus photography. - Improved page performance and accessibility
Optimized images improve overall site performance and support a smoother experience for users of all abilities, including those using assistive technologies. Strong performance also aligns with institutional accessibility and quality standards. - A better overall user experience for all audiences
Optimized images create cleaner layouts, smoother scrolling, and a more polished visual experience. This helps make content easier to consume for prospective students, faculty, staff, and visitors.
Images play a critical role in how users experience Iowa websites. By choosing the right image resolution, compressing files before upload, and regularly reviewing image sizes, content editors can support both visual storytelling and strong site performance. By making image optimization a standard part of your content and governance process, your website can remain accessible, engaging, and impactful. These small, intentional steps add up to a stronger, more compelling digital experience that brings Iowa’s story to life online.